It’s always more fun to set up something new with a friend by your side. Let our start-to-finish SimpliSafe installation guide be your right-hand pal as you get ready to protect your home. We walk you through every step of the process to help make your SimpliSafe installation as easy and successful as possible.
Before You Get Started
A few notes before you dig in: Believe me, these pregame tips will make your SimpliSafe installation painless. Fortunately for you, I already made all the mistakes, so you don’t have to.
1. Review the SimpliSafe setup guide
I know it doesn’t sound like fun, but it’s the smart thing to do. And we know you’re smart because you’re taking steps to keep your home and loved ones safe. Seriously, though, SimpliSafe did a great job on this guide and it will help you along the way.
2. Think about where you want to put stuff
The installation moves along at a pretty brisk clip, so I recommend deciding in advance where you want your security system components to live.
- Base station: You want a central location and a dedicated power outlet (not one connected to a light switch that could be accidentally turned off). And you don’t want to place it on the floor. I have a fairly small, one-level home, so I put it on a desk in my entry hallway where I could hear it in the living room, kitchen, or bedrooms.
- Keypad: We recommend putting the keypad wherever it will be most convenient; near the door that you use the most is a good place to start. And you need to think about the distance between the base station and the keypad. SimpliSafe recommends keeping them 10 to 100 feet apart.
- Entry sensors: These are the sensors that guard your doors and windows. During setup, you need to name each of them, so it will help move things along if you already know that you want one on the front door, one on the back door, and one on the kids’ bedroom window. You can also practice placing the sensors. You need to line up the magnets, so if you check it out in advance (and even mark the placement for later reference), you’ll be all set when it’s time to activate them and stick them up for real.
3. Set the scene
I tend to get flustered when I set up new technology or build a new Ikea table, so I always make a plan to diffuse myself. Put on some happy music, grab a relaxing beverage, and take some deep breaths. Now you’re ready to roll up your sleeves and get down to the nitty-gritty.
How to Install SimpliSafe
1. Set up the base station
- Take out the base station box and unpack it. You should have the base station unit and a power cord adapter.
- Attach the power cord to the base station. It plugs in from the bottom of the device, not from the side, so that might be different than what you’re expecting—it was for me.
- Take the base station to your predetermined location (or, if you skipped the pregame, figure out where you want to put it and go there).
- Pull out the battery tab.
- Plug in the base station. Again, make sure it’s a dedicated outlet that isn’t connected to a switch. You don’t want to accidentally turn off the power to the one gadget that’s keeping your home safe.
- Step back and congratulate yourself on how easy it was to complete the first step.
Expert Tip
2. Set up the keypad
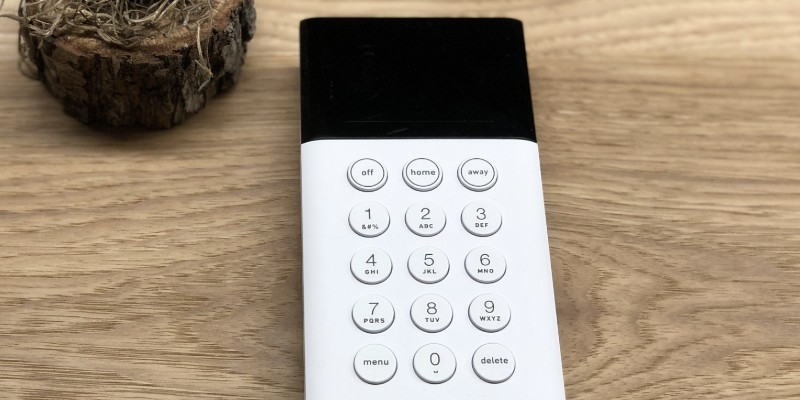
- Unpack the keypad box and peel off the film protecting the screen.
- Pull out the battery tab to power on the device. The keypad will automatically start searching for the base station so they can pair up. After the keypad and base station find one another, you’ll be prompted to set up your master PIN. This number is the key to everything—it lets you arm and disarm the system, turn off a false alarm, cancel a panic alert, and control the other elements of your SimpliSafe system.
- Choose your master PIN. The default PIN is 1234, but you want to change it to something that nobody knows. Make the PIN unique, but something that you can remember. Avoid things like your address and phone number, or special dates like anniversaries and birthdays. And don’t use the same PIN you have for your debit card or any other account.
- Enter your master PIN. Use the buttons on the keypad to enter the PIN you’ve selected. When you finish, click the right side of the screen to set it. I looked for a button or something to click, like on the side of my iPhone, but there isn’t one. The screen itself actually “clicks” on either side, sort of like a gaming console. So don’t be afraid to tap the screen at will.
Expert Tip
3. Install the keypad
NOTE: After the PIN is set up, the keypad is going to prompt you to start installing the sensors. But we recommend installing the keypad on its bracket first. You can still take it off and carry it with you later when you install the sensors.
- Place the keypad in the spot you’ve designated. SimpliSafe recommends keeping at least 10 feet between the keypad and the base station, but I set up mine about three feet away and there were no problems.
- Attach the keypad to the wall. There are already four adhesive strips attached to the back of the keypad bracket. Peel off the adhesive strips on the back of the keypad and stick it to the wall. We recommend doing a dress rehearsal with a level and a pencil to make sure you get it on straight. You don’t want to be annoyed by the skewed angle of the keypad every time you see it.
Expert Tip
4. Install your sensors and devices
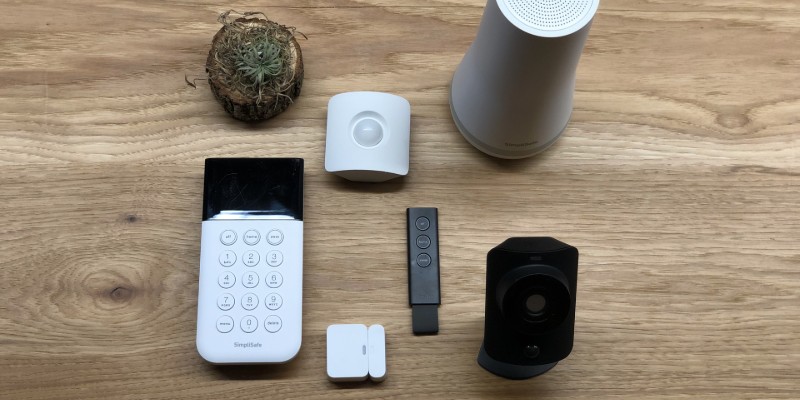
- Start with one of your entry sensors. All of the sensors are labeled in individual boxes. Entry sensors are for doors and windows, and the others are motion, panic, water, freeze, and glassbreak sensors. Devices like smoke and CO detectors, panic buttons, and extra sirens are also clearly labeled.
- Go to the door or window where you want to install the sensor and take it out of the box. I often get into battles with little boxes, so I like to get everything opened up before I dig into the installation.
- Follow the installation prompts on the keypad. Your keypad guides the rest of the sensor installation process, but to make it simple, we’re breaking down each step for you anyway.
- Pull out the battery tab.
- Test the sensor. After you remove the battery tab, you need to test the sensor to make sure it’s working. The test button is small and round and located on the side of the sensor. The SimpliSafe guide refers to it as the bottom of the sensor, but I looked everywhere on what I thought was the bottom (it was the back) and didn’t find the test button until I looked on the side. You’ll know it works when you get a flash of blue light from the sensor and the keypad prompts you to name the device.
- Name the sensor. SimpliSafe makes this step easy with suggested names like “Front Door,” “Back Door,” etc. To scroll through the names, click on the top or bottom of the keypad screen. After you find the appropriate name, click the right side of the screen to select it.
- Test the placement of the sensor. Before you rip off the covering over the adhesive, make sure you’ve got the sensors lined up correctly. There are grooves on the magnet and the sensor, and those need to line up. You’ll know you’ve got it right if you see one blue flash when the door or window opens and two flashes when it closes.
- Mark your spot. I‘m not good at eyeing that ideal sensor alignment, so I go old-school and use a pencil to mark my spot. I recommend making a line at the top or bottom of the sensor to make it easy to place them back in the correct spot when you’re ready to adhere.
- Place the sensor. After you’ve tested everything and marked your spot, the only thing left to do is take off the adhesive film and stick it in place
Expert Tip
“Wash, Rinse, Repeat”
These steps apply to all of the sensors and devices that you need to install—whether it’s a glassbreak sensor or a motion sensor. The keypad will continue to guide you through the installation of each sensor and device.
5. Finish up
After you’ve installed all of your sensors and devices, click the right side of the screen where you see the word “Done.”
At this point, you’ve got a SimpliSafe security system that’s set up and ready to sound the alarm if someone opens a guarded door or breaks a protected window. This level of protection will alert you to danger and possibly scare off an intruder, but it won’t give you alerts, remote control, or a direct link to help from a monitoring center. If you want those extras, it’s time to think about adding a monitoring plan.
Add a monitoring plan
The keypad will ask if you want to add a monitoring plan. It provides a link that will take you to the SimpliSafe plan options where you can choose a monitoring plan. Click on the link, and it will walk you through the monitoring plan setup process.
Skip the monitoring plan
If you don’t want to shop for monitoring right now because you just triggered a panic alarm and scared everyone to death (yes, I did that), then click “Next” on the keypad screen. Click “Done” one more time, and you’ll get a heavenly message that says “Setup Complete.”
Expert Tip
Bonus Tips to Help You Make the Most of Your SimpliSafe System
Motion Sensor Installation Tips
- Install the motion sensor with the test button facing up toward the ceiling.
- You don’t have to stick the motion sensor to a wall. It will work on a shelf, but it detects motion within 30 feet and looks both side to side and up and down, so a relatively high corner spot is usually best.
- If you’ve got a pet, you can tweak the motion settings to avoid an onslaught of false alarms and alerts. Dogs over 30 pounds can go undetected by turning the motion sensor upside down (pointing the test button down toward the floor) and placing it about four feet from the floor. If you’re a cat person, make sure the cat can’t get to the sensor—put it at least six feet off the ground and don’t place it on a shelf they can climb on.
- To avoid motion alerts when you’re home, make sure your system is in HOME mode.
Glassbreak Sensor Tips
- Don’t place the sensor directly on the glass.
- Put the sensor on a wall or shelf that’s less than 20 feet away from the window you want to guard.
- If you have curtains, keep the sensor within five to 10 feet of the window. Curtains can muffle the sound of breaking glass.
- Avoid the kitchen. The regular clinking of glasses can trigger a false alarm.
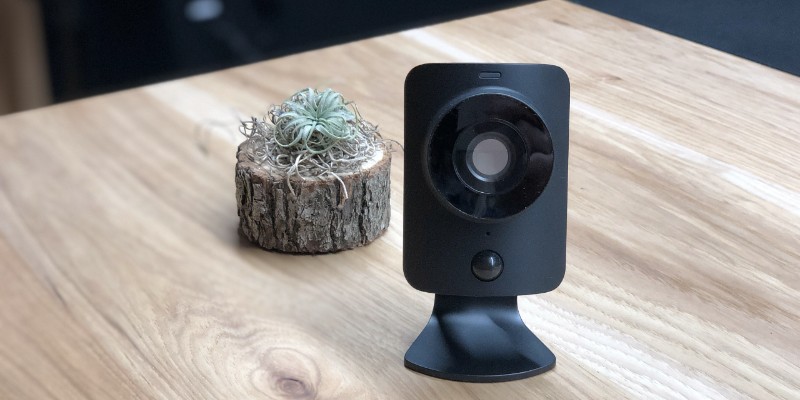
SimpliCam and the SimpliSafe Doorbell Pro
Full disclosure—I haven’t been able to test the SimpliCam or the doorbell camera yet. But one of our team members used the SimpliCam for a few months to keep an eye on her rugrats, and she really liked it. Stay tuned for our upcoming review of the SimpliCam. If you’re interested in an indoor security camera, we have a complete security camera guide to help pick the right one for your home.
Expert Tip
When it comes to SimpliSafe’s doorbell camera, I was geared up to give it a whirl when I discovered I needed to hardwire it into my existing doorbell. Because SimpliSafe has a lot of wireless equipment, I was hoping to test it at the office, but I had to postpone until I could take it home. But don’t worry—we’ll post an update as soon as we’ve put the Doorbell Pro through its paces. In the meantime, if you want to compare what’s out there, we also have a video doorbell guide.
Now that you’ve survived the installation of your SimpliSafe system, you’re on your way to becoming a DIY smart home security pro. Here are some more resources to keep on hand if you get the bug to expand your current home security or smart home setup.
The post How to Install a SimpliSafe Home Security System appeared first on SafeWise.
Aricle source here: How to Install a SimpliSafe Home Security System


No comments:
Post a Comment